WILL Website Manual for Content Authors
Digital Media Essentials - How to Work with Media for the Web
Managing Your Digital Media
Broadcasting is less than a century old. Digital media is less than 25 years old in any practical sense. Change in media technology is so rapid that it's challenging for all of us to keep up. Working with digital media can seem very complex. But we can do a few simple things to smooth our progress in the digital media age.
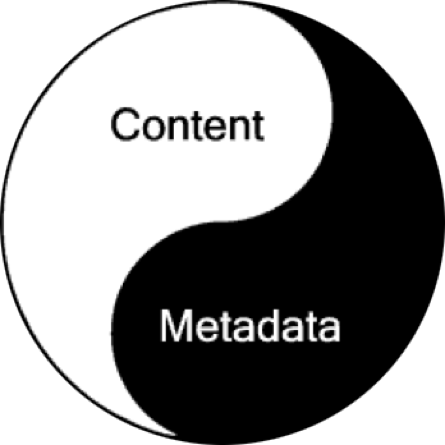
The most important thing to grasp is the foundation of everything digital:
- Content
- Metadata
Content is the essence of what we produce: a story, a video, an audio report, a photo. These are now digital media files.
Metadata is information about Content. Examples are Titles, Dates, Description, Byline, Caption, Categories, Keywords, Producer credits, Copyright notices, and a large number of other possible facts about the content.
Content and Metadata come together in file names. If you name your files well, you can see at a glance what the file is.
This matters more over time as we produce more and more content. We need to be able to store digital media and find it later. If we don't have good metadata, and don't use good practices in naming our digital media files, the value of what we produce will be lost.
WILL File Naming Convention
Keeping track of thousands of digital media files over time is challenging to say the least. A key part of managing content is use of a standard file-naming system.
Each producer should follow this convention when creating audio or video files:
Short name of the program or activity, followed by the date the file is aired or created (formatted as YYYYMMDD). The file extension (like .mp3 or whatever) is added automatically when you create the file.
Examples:
- news20130605_erika_harold.wav
- focus20130129.wav
- midamericangardener20121014.mov
Please note:
- use only lowercase
- no spaces allowed in filenames
- no characters other than letters, numbers, underscores, and dashes
Why is this important
Most everything we produce is going on the internet, which means people getting it through a web browser or mobile device. Characters in file names other than letters, numbers, dashes, or underscores will break the links to the files in many cases. Using lower-case is important for consistency, and makes it easier to look at a folder with thousands of files without going stark raving mad. Using the [name][date] format nicely lines up all related files in exact date order. For things like News where we might have several audio files created on the same date, appending a short slug solves the problem.
Encoding and Publishing Online Media
WILL has an automatic encoding system for audio files you want to upload to the web. We call this the Watch folder for web audio archives. The Watch folder does three very important things:
- It encodes edited wav files to the correct mp3 format for the web
- It saves all the wav files in one place for preservation and future reuse
- It saves you time and effort
You use the Watch folder by dragging and dropping your finished wav files into it. The encoding system will grab the wav file, encode it to mp3 format, and save the mp3 file in another folder called tempencoded.
Where to find the Watch folder
The Technology Department has probably already set up desktop shortcuts for you for both the Watch and tempencoded folders. If not, you can send a request to will-help@illinois.edu and ask them to do this.
If for any reason you need to create your own shortcuts or drive mappings to these folder, here they are:
Watch folder
- Windows: \\will-encoder2.ad.uillinois.edu\watch
- Mac: smb://will-encoder2.ad.uillinois.edu/watch
Tempencoded folder
- Windows: \\storage01.will.illinois.edu\willarchive\tempencoded
- Mac: smb://storage01.will.illinois.edu/willarchive/tempencoded
If you get a message that you don't have permission to access these folders, just contact will-help@illinois.edu.
Using the audio encoding system, and uploading mp3 files to the WILL website
- Edit your finished wav file using Audition etc
- Drag and Drop the wav file into the Watch folder on your desktop. The encoding system will then encode the wav to an mp3 files within a minute or so
- Create your web story or content entry in the website CMS
- Upload the mp3 file from the folder named tempencoded into the Audio field in the CMS entry form.
A Note on File Names
The file naming convention above should be applied before wav files are dropped into the Watch folder for encoding. Please name all media files based on this naming convention from the beginning of the process.
Troubleshooting
If a wav file dropped into the Watch folder doesn't encode, it's usually a problem with the wav file itself. This can happen in Audition (or whatever software created the file) if the Save settings are something other than a standard wav file. For purely audio content, it's best to always save wav files at a 44100 sampling rate, and 16 bit depth.
On very rare occasions, the encoding automation may be stacked up with other encoding jobs. And like anything involving computers the system can crash, but this has been very rare.
In any situation where things aren't working correctly, send a support request with details at will-help@illinois.edu.
Audio Encoding Specification
If you use the WILL automatic encoding system for audio files, you never have to worry about encoding your files to the correct format for the web. Please use that system always, as it will automatically move the source wav file to permanent storage.
For the sake of clarity and documentation, here is the audio encoding spec we use for all online audio:
- File Format: mp3
- Total Bitrate: 64 Kbps
- Bit Depth: 16 bits
- Sampling Rate: 44.1 KHz
- Audio Channels: 1 (mono)
Why is this important
People increasingly access our audio content on mobile devices with limited data plans. Some users are still on slow internet connections. The above spec provides good quality at a reasonably low bitrate so it's usable by more people. On rare occasions we may want a higher bitrate, and stereo channel configuration, for example in the case of music. We are currently not providing downloadable music files, but if we do start to provide this we can revisit the audio encoding spec for high fidelity content.
Video Encoding Specification
Here's the video encoding spec for all video file uploads to COVE, YouTube, Vimeo, and Kaltura. The same file can be uploaded to these platforms as needed.
The platforms will then encode the video file again to their own spec. That's why we give them a compressed but very high quality source file, which they will compress further.
Video Stream
- File Format: MPEG-4 (.mp4)
- Total Stream BitRate: 5 Mbps Video Stream
- Codec: AVC (H.264)
- Frame Size 16/9: 1280 x 720
- Frame Size 4/3: 960 x 720
- Frame Rate: 30 fps
- Pixel Aspect Ratio 1:1 (square pixels)
- Video Standard: NTSC
- Scan Type: Progressive
- Video Stream BitRate: 4808 Kbp
- Video Stream BitRate Mode: VBR
Audio Stream
- Codec: AAC
- Audio Stream BitRate: 192 Kbps
- Audio Stream BitRate Mode: CBR
- Number of Audio Channels: 2 (Stereo)
- Audio Channel's Positions: L, R
- Sampling Rate: 48 KHz
- Bit Depth: 16 bits
Catagories Gotcha
When creating a new template/channel that requires the audio player ensure that you define the channel name such as longerlisten or youthmedia you must also go to the audio player snippet and define that name in sn_audioplayer_channels.